
Hey guys!
Frankly i dont know where to start, but i will just share what i know and to be honest, i dont know that much. But i hope enough to help you guys want to start doing it! A little story why i even write this post, is because it reminds me a few months ago when i wanted to start rerooting my doll’s hair but i have almost 0 knowledge and i don’t know who to ask!
I tried to check youtube but unfortunately i need a more basic one than what i found. So with almost no knowledge at all about reroot, i found myself searching for tools on online shop. Still it confused me, what exactly those tools are for? How to use it? Can i do it? Lol. But then i brave my self and check out some tools that i think will be useful for reroot.
Imagine my confused face when i see this:


A lot of questions appear lol. Like; “what does it do? How will i use it? What needle i should choose? Do i need that one as well?” yadda yadda. So, i just decided to buy them all, lol. Then, when it arrived, i finally learned what and how to use it by myself, it just came like common sense lol.
Well, because of that, i want to spare you all the pain of not knowing and scared to buy this basic reroot tools. So here, i will share a little and just what i know about it. Please do leave a comment if i gave the wrong information or you want to add the information!
ps. now come to think about it, why did i focused on finding it on youtube where i can search on other’s blog. Oh dear silly me.
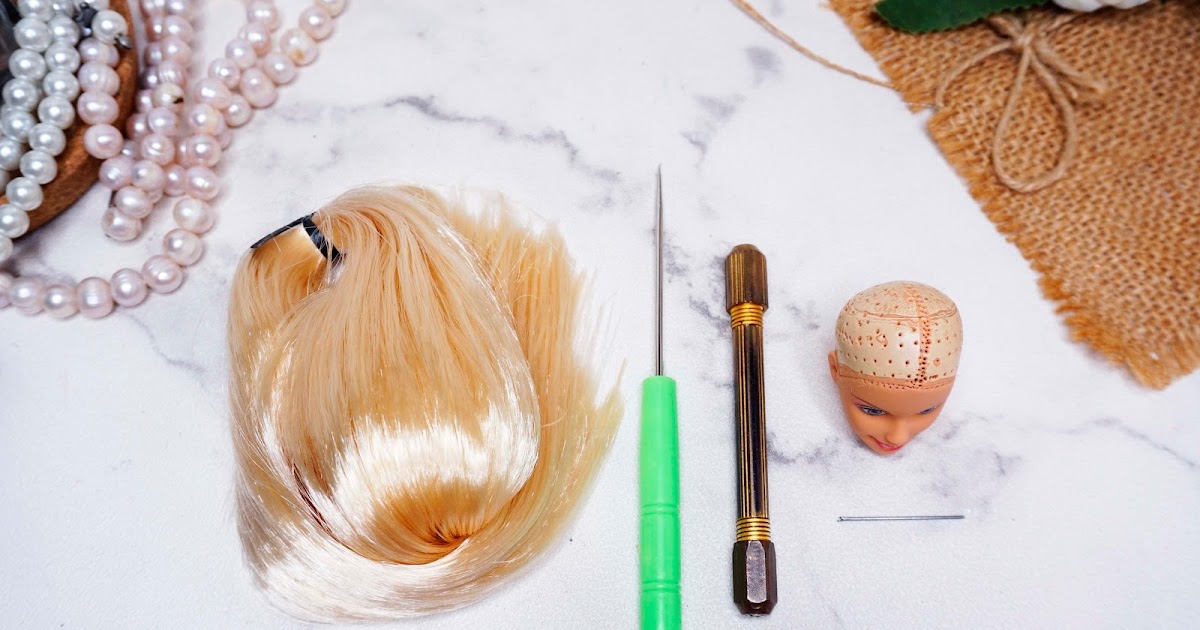
THE TOOLS:
You can also use regular needle if buying tools too much for you. I saw a few videos on youtube how to reroot with regular needle, so you can check it out. But, if you are lazy like me and just want it quick, you might find these tools to be super helpful.
1. Reroot Tool
So this is it! The reroot tool. Mine is in gold (but now it already turned brass). It got two side with different size of collet. You can screw-unscrew the collet to put the needle in or out. Screw the collet tightly so it will not be loose when you use it to reroot.


2. Needle hook
It’s a pronged needle with the size of 0.6mm and 0.8mm that i found. I bought both, but the 0.6 ones broke quiet easily. In fact I broke one already and then i moved to the 0.8mm size. It’s more sturdy, a bit bigger and haven’t break since. Plus i think it’s more suitable for Barbie head; how much the hole can hold the hair in one root quite perfect with the 0.8 ones. That at least for me, you can try both size and find which one is perfect for you.

this one is 0.8mm needle. My 0.6mm broke so i kinda disposed it.

3. Big Pointed Needle
Some reroot tool has this pointed needle that can be screwed to the reroot tool, but mine is a separate tool. It is quite big of a needle and you can use it to create hole in your doll’s head for reroot purposes. Because sometimes we need to create a new hole for the hair we desired. Or you can also use this tool to widen the hole.


That’s the basic tool! Turned out it was so easy right! As for the hair, i search “reroot hair” on online shop and find the desired color. Even thought there aren’t too many hair color available here (or maybe i just don’t know where to search yet).
HOW TO USE THE TOOLS
This is basically how i use the tools:
1. Find the perfect hair you want to use.

2. Remove your doll’s head from the body if you can, this will help to secure the hair after the reroot process.
3. Poke the head for more hole or to widen the preexisting hole if needed.

1st method:
- Separate small section of hair, just a few strand to fit the 0.8 needle. If you’re putting to much hair, some of the hair will simply doesn’t stay on the hook. So just estimate.
- After the hair is secured on the hook, push the needle into the hole in your doll’s head. One by one and not too much hair each of the hole. Push it gently so the hole won’t split into other hole near it.
- When the needle already inside, pull back the needle outside and there is your first strand of reroot hair.


2nd method:
- Separate small section of hair strand and hold it between your fingers.
- Still holding it the same way, bring the hair closer to the head and hold just a little far from the hole you wanted to root.
- Using the tools, grab a small section from the hair strand you hold and push toward the hole gently so the hole won’t split. Once it’s already inside, pull the needle back out and there goes your strand of reroot hair.


4. Do the same thing for the other holes using 1st or 2nd method as you like until the head is full or as you wanted.
5. To make the new hair secure, glue inside part of the head. Squish some glue into the head and even it out with cotton bud (that’s why it’s better to pull the head from the body). I used all purposed glue, you can also use fabric glue.
6. Wait until it dries perfectly (around 24hr) before brushing/styling the hair and put the head back in the body.


This is some result of my barbie doll’s hair reroot. The Clara and Annika only part rerooted, i only fill in the bald spot. The third picture is a fully rerooted barbie hair.


Love,
Auzola
